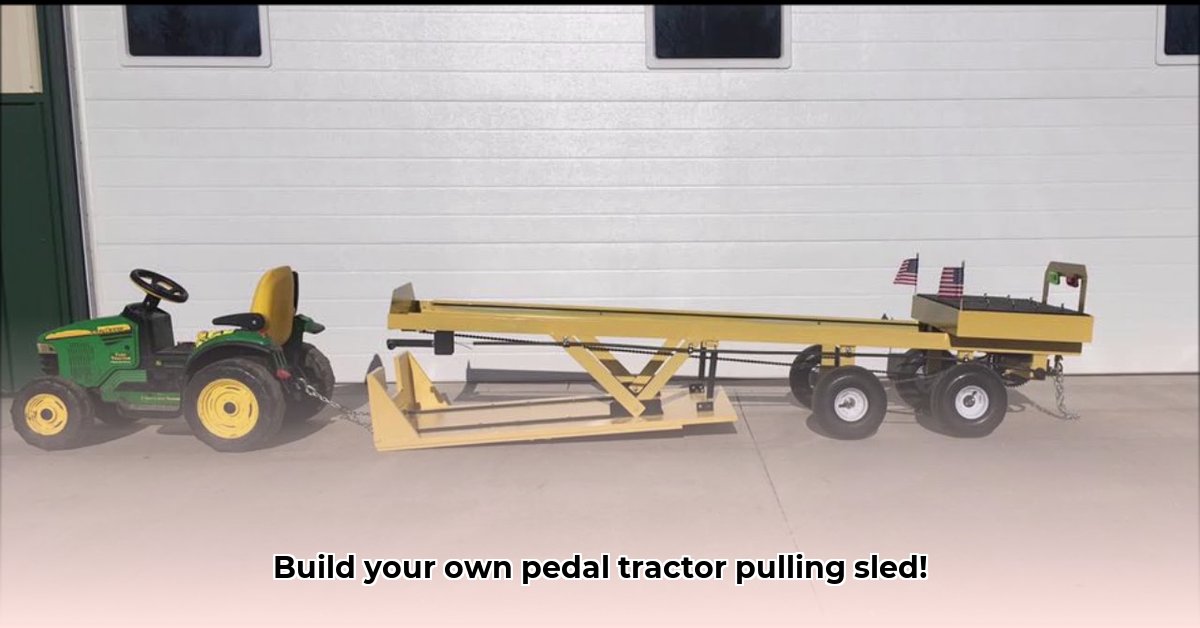
Pedal Tractor Pulling Sled: Your Kid's Next Backyard Adventure
Get ready for some serious outdoor fun! This isn't just about building a sled; it's about creating a memorable experience for your kids (and maybe yourself!). We're building a pedal-tractor pulling sled – a fantastic blend of engineering, imagination, and good old-fashioned playtime. This project also offers a great opportunity for sustainable living by repurposing materials you may already have! For more inspiration, check out this detailed guide.
Key Takeaways:
- This project provides a standardized, yet customizable, design for a pedal tractor pulling sled.
- We use easily sourced materials, making it budget-friendly.
- Safety is prioritized, and we'll highlight crucial safety measures.
- You can personalize to fit your kid's age and abilities.
Rounding Up Your Supplies: Let's Get Started!
Before we saw anything, let's gather our materials. Remember, flexibility is key! We're aiming for sturdy and safe, but get creative with what you use. Think repurposing and upcycling – this project's about using what you have!
Materials:
- Sturdy Base: Strong wooden planks (2x4s, or plywood—length depends on your design and tractor size).
- Metal Reinforcement (Optional): Scrap metal (strong but not too heavy) for extra durability. Ensure no sharp edges.
- Wheels: Old wagon wheels, sturdy lawnmower wheels, or thick-walled PVC pipes.
- Fasteners: Bolts, nuts, and washers (various sizes).
- Paint (Optional): Add personality! Let kids choose their favorite colors.
- Pedal Tractor: The star! Size determines the sled's size.
Tools:
- Measuring Tape: Accuracy is vital!
- Saw: Circular saw (preferred) or hand saw.
- Drill with Bits: For holes for bolts and potentially attaching the metal base.
- Screwdrivers: Phillips and flathead.
- Wrenches: To tighten nuts and bolts securely.
- Safety Glasses & Gloves: Essential for eye and hand protection.
Building Your Pedal Tractor Pulling Sled: A Step-by-Step Guide
Let's build! Adult supervision is crucial, especially with power tools.
Step 1: Laying the Foundation: Measure and cut wooden planks for the base. Consider tractor dimensions to ensure enough space. Securely fasten planks using bolts, nuts, and washers. Make sure it's rock-solid!
Step 2: Reinforcing with Metal (Optional): Attach the metal sheet to the base for extra strength. Smooth any sharp edges.
Step 3: Rolling Along: Attach wheels securely to the base's underside. Make sure they spin freely.
Step 4: Connecting to the Tractor: This is creative problem-solving! Attachment method depends on tractor and sled designs. Strong straps, brackets, or custom wooden supports might work. The key is a secure connection.
Step 5: Adding Finishing Touches: Personalization time! Let your child choose colors, add stickers, or create custom designs.
Keeping it Safe: Safety First, Fun Second!
- Wear safety glasses and gloves: Protect your eyes and hands.
- Power tool caution: Adult supervision is essential.
- Constant supervision: Keep a close eye on children during construction and playtime.
- Regular checks: Inspect the sled before and after each use for loose parts or hazards.
Troubleshooting Those Little Hiccups
- Wheels are stuck: Check for obstructions (debris, uneven ground).
- Sled feels wobbly: Add support using wooden braces or metal reinforcement.
- Tractor connection is loose: Double-check attachments; tighten bolts and straps.
Customizing Your Creation: Let Your Imagination Run Wild!
Add a seat, decorative flag, or custom paint jobs. Let your child be involved!
Community & Sharing: Join the Pedal Tractor Pulling Sled Community!
Share photos online using #DIYPedalTractorSled! Inspire others and share tips.
Remember, this is an adventure! Experiment, adapt, and have fun! The goal is creating a lasting memory. Happy building!